

Some people consider React Native as a write-once-deploy-anywhere solution. Reactive Native speeds up the development of applications that are written for both Android and iOS. Even web developers can easily write native applications with React Native.
When Facebook faced the problem with redesigning their apps, they were looking for a solution to handle the users and roll out new features. Facebook required something faster and more robust to be able to take care of the huge traffic it gets on a regular basis.Facebook team opted for React to accomplish their objectives.
One major advantage with React Native is that it employs a faster virtual DOM. It allows adoption of lightweight components. Developers can use React with PHP, MySQL, MongoDB, or any other database systems also.
If you’re wondering if React would be used for designing web applications, then you should know that React Native is a successor of React.js for fast mobile app development. The things learnt in React can be applied in React Native also using the same workflow. You can use components, states, and props to build your native application. Without sacrificing on the performance or the look and feel of native applications, one can build fully native applications with React Native. It facilitates fast mobile app development and this is what makes it a trusted choice of many developers as well as users.
Deployment for beginners
Once you develop your React application, you would obviously want to share it to the whole world. You won’t want to go to the users and tell them to run the application locally. If you want to share your app, you need to make it open for the entire world in the market. Also, you can make frequent version updates to the app for adding new features, bug fixing, and more.
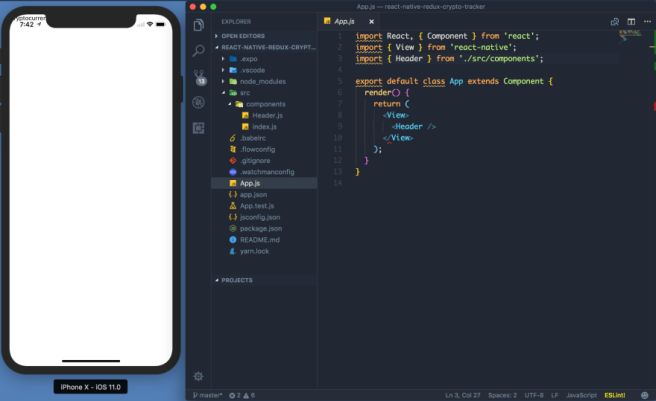
How to create React Native project?
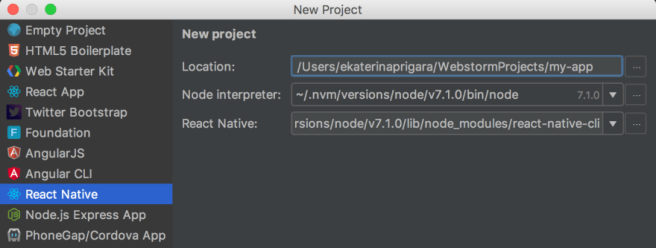
Hire best react native developer and use the following command to create new React Native project:
react-native init HelloWorld.
How to run React Native into HelloWorld
import React, {Component} from ‘react’;
import {
Text,
View,
} from ‘react-native’;
class HelloWorld extends Component {
render() {
return (
Hello World..!!
);
}
}
const styles = StyleSheet.create({
container: {
flex: 1,
}
});
module.exports = HelloWorld;
Follow these steps to run your app on Android
- Install Android Studio
- Install Android SDK
- Open your android studio, file-> open -> and browse to your project folder HelloWorld-> android
- Run the app from Run-> Run ‘app’
How to change the app name
Edit the app_name in app_name in strings.xml file app/src/main/res/values/strings.xml
How to change app icon
In order to change the app icon, you should add the icons in mipmap-hdpi, mipmap-mdpi, mipmap-xhdpi, mipmap-xxhdpi. Change the android:icon=”@mipmap/ic_launcher”
How to generate signed APK
Users should create a keystore for their project and keep it safe and secure.
Build -> Generate Signed apk
If you do not have a section in the keystore, you can create one or select the path to the existing section.
Users should specify a strong password for keystore and specify a certificate detail for creating new keystore.
Click next and finish.
How to run your app on iOS
After initializing the React Native project, you can run React Native iOS inside the newly built project directory. If everything is set up properly, you would be able to see your new app running in the iOS simulator.
Specifying a device
You can specify the device you want the simulator to run with. You can add the device name as a string.
How to run your React app on iOS device?
- Plug in your device via USBYou need to connect your iOS device to your Mac using a USB to lightning cable. Navigating to the iosfolder in the project will be able to plug in your device. Open the .xcodeproj file within it using Xcode.
In case if you are running an app on your iOS device for the first time, you may have to register your device for development. You can do this by opening the Product menu from Xcode menubar and go to Destination. Your device would be registered for development.
- Configure code signingIf you do not have an Apple developer account, you need to register for it.
Select your project in the Xcode Project Navigator and select your main target. Go to “Signing” and make sure that your developer account is selected in the Team dropdown.
- Build and run your appOnce everything is set up the right manner, your device would be listed as the build target in the Xcode toolbar. It will also appear in the Devices pane (⇧⌘2). Press the Build and run button (⌘R) or select Run from the product menu. Your app would be launched shortly.
If you are looking for a developer to build React Native app, you should do some research in the market and try to hire the best react native app development company. Experienced React Native js developers can help you transform your vision into a working app.
This post was originally published at- https://dev.to/iverve/how-to-deploy-react-native-app-546n
